What Works for Me – A Committed MTF Crossdresser
By Nora Simone
This is a repeat of a series of posts from the early days of Kandi’s Land, all still valuable information.
Are you satisfied with your female image in photographs? If you’re like me, a committed MTF crossdresser (CD), the answer is No!
As a CD who cares about my image, I understand. Photos of my experiences as Nora are priceless mementos of rare blissful times. Unfortunately, photos often did not accurately capture how I felt and looked (gorgeous of course!).
For many years, it seemed only about one in a hundred photos were good enough to keep (i.e. keepers). This frustration, shared by real and virtual friends, led me to develop some posing tips for improved photos and memories. These have worked for me so I thought others would like to know about them.
Please understand, I am no supermodel. Unlike naturally beautiful CDs whose photos always look great, I need all the help I can get. At 6 ft. tall without heels, and having an athletic inverted “V” male body shape (i.e. broad shoulders, no hips), being mature (i.e. old), and weighing too much, I hope readers appreciate the challenge and can relate to my situation. I can’t be the only not-so-skinny CD who wants to look pretty, can I?
If these posing tips helped me look naturally female, it’s likely they should help others. In fact, these tips should be useful for any woman who wants to look more naturally feminine, relaxed, and pleasant in still photographs – from professional photoshoots to “selfies.”
Focus on Posing
The focus of this article is centered on posing. By “posing” I mean assuming a particular attitude, position, or stance for a photo. It’s important to understand that to capture great photos, I also ensure appropriate hair (or lack thereof), padding and cinching, wardrobe, accessories, and makeup. These added elements are critically important for achieving a convincingly female look.
Manage Expectations
Its best to start with low expectations because when it comes to photographs, that is reality for most of us. Normal people simply do not photograph well naturally. Even with a professional photographer, ideal lighting, background, and you looking your very best – relatively few images will be “great”.
A photographer friend, Cassandra Storm, reviewed this article and reminded me of another key point. I am my own worst critic! Perhaps most of us are. So, in addition to managing your expectations, make sure you get feedback from others as you may be surprised. For example, one photo I thought average surprised me by rocketing to my most commented on and among the most fav’d images in my Flickr stream. It’s not among my favorites at all! What? Why?
With my experience shared in this article and your patient practice, the number of your “keeper” images should increase as well as your confidence.
Have a Reasonable Goal
Everyone should have at least one “standing’ and one “sitting” pose you can reliably “snap to” when the occasion arises. With them, you will always be prepared for social scenes and selfies.
Limitations
The advice provided in this article is based upon techniques that have been useful to me. These are not necessarily universal fixes. The more you look like me physically, the more likely the tips will be useful for you. Regardless, I hope you find my experience useful as a starting point and feel encouraged to experiment on your own. Successful posing ultimately is about what makes you happy with the results. It’s not the same for everyone.
General Golden Rules
Keeping the following two rules in mind have helped guide me in all posing opportunities. If you remember to apply them, you are likely to see more successful photos right away.
1. Posture: Whether sitting or standing, it is best to start with a straight spine. This starting point is easier said than done given all the time I am hunched over my keyboard (like right now!). To quickly straighten my spine, I stand with my heels, buttocks, shoulders, and head against a wall and hold for 60 seconds. It’s tough but I always stand taller and straighter afterwards every time! Remember a straight spine is the starting point – you need to relax and be flexible for a good natural pose, not be stiff and rigid.
2. Distance to Camera: Like your car’s mirrors, objects closer to the camera will appear even larger! If you don’t want it to appear larger, move it away from the camera. This applies to everything!
Now, let’s get into more details that will take your posing to an even higher level.
Understanding Your Body is Critical
My advice centers on recognizing and addressing general physical differences between men and women as I have experienced or viewed them.
Worldwide, people recognize visual ques to gender. My goal, and yours I presume, is to naturally present as many female visual ques in photographs as possible.
My challenges for doing so and advice for addressing them follow.
Height – Tall ladies exist so this is less of an issue for me especially when posing alone. However, to minimize the appearance of being unusually tall there are a few things I am mindful of:
1. I seek to pose with women taller than me! They are out there. Even though we don’t see eye to eye, I love looking up to them in photographs!
2. I avoid being photographed with objects that convey a reliable sense of scale. For example, standing next to a normal height bar as a reference point makes it clear I am a tall lady.
3. In groups I seek to position myself to the back of the pack. Doing so diminishes my overall body mass and no one can see how I’m slouching down and as I hide behind others.
Shoulders and Arms – Anything that emphasizes my broad shoulders is not good for me. So, I often avoid poses with my shoulders square towards the camera. I have found a 45 to 60-degree body angle to the camera works well to minimize my shoulder width. Also, I also avoid top-down shots because, as previously mentioned, whatever is closest to the camera looks larger.
When I stand naturally, my upper arm presses against my torso and it looks (wider really) larger than it actually is. This size is especially magnified when my arm is towards the camera. I can correct that by just lifting my arm an inch or two so it is “floating” and not pressed against me. Alternatively, I can pose my hand so my arm is in a different position, such as putting my hand on a hip (see waist) or in a rare pocket (see hands)!
Legs and Feet – I have to concentrate to keep my legs close together when standing. I routinely forget because years of male sports muscle memory are very difficult to overcome. Also, I feel a bit unstable in high heels and naturally want to widen my stance for safety. One remedy is to simply cross my legs at my calves or ankles while standing. It looks natural, gives my body some curve appeal, and it helps make my legs look longer – all good things!
The same is generally true while being seated – knees or ankles together or crossed is my rule. Unless I want a “big legs” shot (some do!), angling away from the camera is best for me.
My large feet (size 13!) look best with my toes pointed to extend the length of my legs – shoes or not. When standing, I avoid having my feet sideways to the camera.
Hands – Female hands should look elongated, graceful, and relaxed. This is extremely challenging for me so I tend to hide my hands in photos. True! If that is not possible, I try to show a thin side view. I also have to concentrate on relaxing my hands so they are curved with fingers together, not straight, flexed, or splayed, (except for a special effect – see framing) and my thumb tip no more than an inch or two open. The key is to relax my hands and minimize their presence. Because anything in front of me looks larger in photos, I try to not extend my hands forward unless necessary for a special effect. When posing with hands near my face, under chin, or at my neck, I make sure my hands are further away from the camera than my chin. Finally, I also avoid making any “male-like” big hand gesture such as a fist, or palm facing “high five”!
Hips – I have no natural hips, and I don’t always wear oversized hip pads – especially in warm weather. As a remedy, when sitting, I might carefully splay my legs behind a chair to give the illusion of width or otherwise spread my skirt in a lady-like way. When standing, I might play with my dress/skirt hem to make it look more full from the waist down and/or angle my body instead of presenting a direct frontal view. A waist belt cinching a loose blouse works well to create an illusion of hips too! A direct frontal view emphasizes horizontal dimensions which do not work in my favor at all for hips or shoulders. When reclined, I might try to elevate a leg to add below-waist width.
No advice about hips is complete without some mention of weight placement while standing. Women commonly rest their weight on one leg or another – usually not equally the same as men do. Doing so pops my hip out to create a natural female curve. I prefer to place weight on my right leg but can do either as needed.
Waist – I always try to ensure there is a gap between my arm and waist when standing. Doing this makes my waist look smaller. Having a gap at my waist level also makes me look curvier while in recline or sitting. The easiest way for me to do this while standing is to put a hand on, and slightly behind, my hip which is an essential element of the classic “skinny lady” pose.
Head – I try to tilt my head slightly. This adds fluidity and curviness to my total shape. Most women, including my wife, seem to do this all the time. Some of my model friends believe an “S” curve body in a standing pose, which includes the head, is the most feminine possible. It does look good!
Neck – The appearance of a double chin ranks in the top three things I am most worried about in photos. To avoid this nightmare in photos, I do the following:
The “turtle” technique with these steps:
1. Stand or sit with a straight spine.
2. Shift shoulders back and down.
3. Project face forward.
4. Aim chin outwards.
These are some extra tips I learned from a portrait photographer who works with Hollywood stars that work for me:
1. Pushing my tongue to roof of my mouth just behind my upper teeth further elongates my neck and relaxes my jawline.
2. I think of bringing my “ears forward”. This moves my entire face forward, not just my chin.
3. Tilting my head down a bit also minimizes any indication of an Adam’s apple.
4. If artistically possible I use my hands or a prop (see separate section on framing) to hide my chin(s).
Face Positioning – My face looks better at a slight angle with my chin slightly down. I avoid facing the camera straight on especially when a flash is used unless posing for a “Most Wanted” poster. Also, from lots of experience, I know a profile (side view) is not my best angle. Perhaps this is true for most men seeking to look female. Sharp chin, jaw, and nose angles are not typical of women – at least not the woman I seek to emulate.
By playing with my hair gently with fingertips, or pushing it away from my face with relaxed spread fingers, I look very feminine and attractive. Don’t you agree?
A highly accomplished makeup artist (MUA), portrait photographer, and cover girl, Amanda Richards told me to never let my nose project beyond my face in a photo. It’s true. Unless I am posing as Pinocchio, I avoid profile and near profile poses where my nose breaks my face line.
Facial Expression – Though it does not come easily to me, a smile is super valuable. A genuine smile conveys a variety of positive signals including confidence. The key is to ensure my smile is genuine. A genuine smile involves my entire face especially my eyes, not just my mouth. A forced fake smile, mouth only, should always be avoided – it’s scary looking! To elicit a genuine smile, I simply try to relax and think of something funny. For example, instead saying “CHEESE”, I like to say “LEPRECHAUN” (another professional photographer tip) which, for some reason, cracks me up each time! Alternatively, I can say and hold “ME” – this always works too.
I have also found it useful to have at least one other “go to” facial expression. For example, I sometimes try to create a gaunt pouty model look by saying the word “POOR” or “PRUNE”, keeping my lips very soft and sultry and holding for a few seconds. Professional model and photographer friends told me about this look but I often crack up as a result so a smile will usually follow.
Eyes – It’s natural to look directly at the camera and I often do unless there is a flash (see above). I’ve also had good luck by looking at an object behind the camera. Doing this gives a more distant dreamy look while still appearing visually engaged.
For a more intimate expression, these two steps work for me:
1. Relax by closing my eyes, breathe deeply, and think sexy beautiful thoughts. Then…
2. Open my eyes just as the shutter snaps the photo. Wow!
Just moving my eyes can drastically change a photo. For example, by holding my head still and moving my eyes to the side, I can create an expectant or questioning look instantly.
Some Advanced Posing Techniques
Framing – A technique used to draw the viewer’s attention to what’s inside the frame. Our fingers, hands, and arms are natural frames to our faces for example. I also find the technique useful for hiding undesirable features such as a double chin or frown lines. Carefully selected prop’s, like color coordinated pool noodles, can also be an interesting frame.
Using Props – I love using props to convey personality, scale, or to emphasize my female image. These are a couple of my favorite techniques.
- Straight Edge – posing next to a straight edge makes my body look curvier in comparison. Awesome MUA, photographer and professional glamour model, Elizabeth A. Taylor taught me to use a lamp post, a wall, a ladder, or long dangling scarves for this effect.
- Curvy Edges – a curvy prop can echo and amplify the curves I want to project in my female body image. A guitar or even a snowshoe have worked for me.
When using props like eyeglasses, perfume bottles, hand fans, whatever, its best to not think of posing. Instead, as Amanda Richards told me, “just use the object as it was intended and get a photo of that motion. It might take a few more shots, but the result will be much more natural in appearance.”
Careful – Do not let the prop become the center of attention instead of you. If you do, you will appear to be promoting or selling it. Keep attention on yourself.
Movement – When multiple photos are being taken (this is usually the case) I like to adjust my pose for each shot even if it is very slight. It’s amazing how the smallest change in pose can drastically alter the image. Don’t just stand or sit there – move!
Flexibility is a challenge for me so I may do even more stretching than the simple spine straightening exercise mentioned previously. Women are generally more flexible than men and it shows in their poses.
Lengthening Neck Further – When posing for a head or full length shot, I make sure my shoulder nearest the camera is slightly lower than the shoulder away from the camera. So, as I prepare to turn towards the camera for a 45-degree angle, I tilt my head slightly away from camera and drop my shoulder nearest the camera slightly. This gives more space at my neck with no bunch up, and as I turn, my head actually ends up appearing centered.
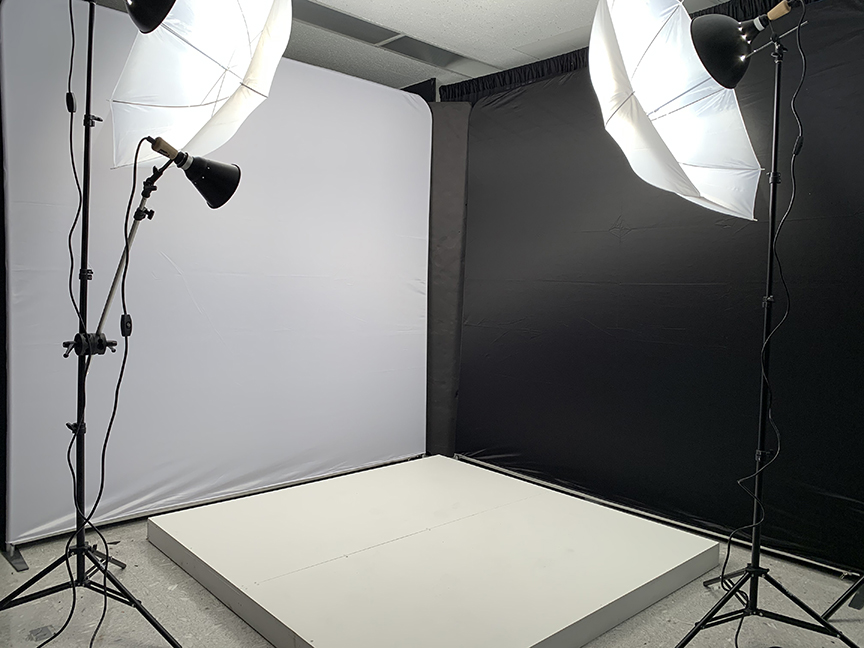
Self-Timer, Remote Control, and Mirror – Many images in my photo collection have been taken with a digital camera using a timer and tripod. To improve pose success, I use a mirror on the wall opposite me – behind the camera. It’s very useful to see yourself just before the camera snaps. Even when I am in a professional photoshoot, I mirror pose for practice before we start working. Also, some of my popular lady friends use a smartphone app connected to their camera to preview a shot and trigger the shutter release. Their results are impressive.
Practice – Are you ready to practice your standing pose? Great, now…
- Stretch your spine.
- Frame your photo in the camera viewfinder.
- Set the camera timer for 10 seconds. Program for multiple shots (burst mode) if the option is available.
- Stand in front of the camera and carefully press the shutter release.
- Race to pose position in front of the camera without tripping on a tripod leg.
- Place your body at an angle (60 degrees perhaps?).
- Plant one foot in front of the other.
- Keep knees close together.
- Put your weight on your back leg.
- Pop your hip out. More is better.
- Place your arm closest to the camera back on your hip.
- Place other arm in natural position or hide it.
- Ensure hands are “small”, fingers are aligned, and thumb is tight.
- “Turtle” your head in four easy steps.
- Tilt and angle your face to camera.
- Position chin slightly down.
- Look at an object directly behind the camera.
- Smile like you mean it!
- Hold it.
- Hear the click(s).
- Breathe.
My Photos
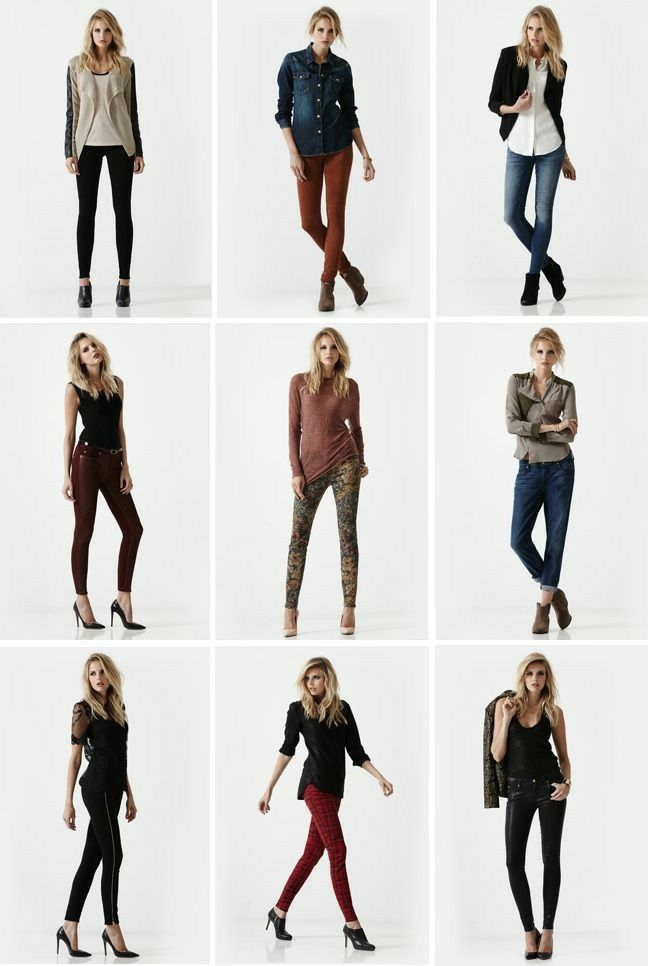
Referenced below, you can see my photos to illustrate points made in this article. These were taken by professional photographers to ensure quality and usefulness. Yes, some are detailed for clarity too.
Of the many photographers and models, I have worked with, I wish to especially acknowledge the following in alphabetical order who have extensive experience with crossdressers and transwomen. Their advice is sprinkled throughout this article. All three have reviewed this article and agreed it would be useful.
- Amanda Richards, True Colors Makeup Artistry (cover girl, makeup, hair, costume, studio and some outdoor portrait photos). Editorial comment: Sadly, Amanda is no longer in business, I also did a shoot with her and I still cherish it almost ten years later.
- Cassandra Storm, Cassandra Storm Photography (event, outdoor, and studio portrait photography) http://cassandrastorm.com/
- Elizabeth Taylor, Makeovers with Elizabeth Taylor (model, makeup, costume, hair, studio and outdoor portrait photography) https://makeoverswithelizabethtaylor.com/
There certainly have been others who helped me. However, I have worked with each of the three talented artists listed above at least five times so I feel confident listing them as a resource for CD friendly posing and photoshoot services.
My best pictures have come from having another person take photos who is experienced in posing, lighting, camera angles, and especially CD body type challenges. Those I’ve worked with have been kind and generous with their advice, and also provided great photos.
Sure, it costs more to get professional advice, but a session or two with an expert can immediately jump start your learning in a way nothing else would. Why waste time?
The chemistry between you and the photographer is critical. This is, I believe, the most important criterion for selecting a photographer. Always ask the photographer what brings out the best in them and then do it. Remember, this is a partnership or collaboration, not a mind reading exercise. Communicate, communicate, communicate! The experience should also be fun.
If you cannot get a personal posing session, there is plenty of advice and information on the Internet and some useful books with useful examples are also available.
Regardless of advice source, the most important thing you can do is practice, practice, practice.
Final Note – Please Don’t Judge Me!
I offer advice to help others. I do not follow it consistently, nor do I claim to be an expert. Posing is difficult to start with and remembering to apply all the tips, especially on a moment’s notice, is impossible for me. I’m human, not a posing fembot!
Click the photo below to see Nora’s Greatest Hits!

I have been blessed by so many friendships and Nora’s is a treasured one!







3 Responses
Hi Nora:
What a wonderful and instructive article that really hits home for me! I have found that as I develop my femme presentation I am also trying to hone my photography skills – two artistic pursuits simultaneously. Presenting a good photographic image of my alter ego has proven far more daunting than I had imagined! My male self has avoided the camera, so the notion of posing felt – and still often feels – awkward and unnatural. I’m working on this and in so doing I have run across the 21 principles that you outline here. All are essential, and now the key for me is to remember them all between #4&5 and making #6-21 second nature! I’m working on it, and trying to be patient with myself also as you suggest. With advice like yours perhaps I will be able to improve my ratio of acceptable photos, currently about 50 discards to 1 presentable.
Thanks also for your “greatest hits” – wonderful and inspirational!
All the best,
Kris
Hi Kris,
I’m glad you found the information useful. Thanks!
Like me, maybe you will eventually settle on a handful of preferred poses. It’s true, some of us who do not enjoy perfect symmetry definitely have a “good” side.
Good luck with photography. For me it’s a lot of work, yet for the great images – it seems so very worth it.
Nora
Nora,
The basic ctiteria is a decent camera with contolled lighting . By a decent camera I mean one where the correct lens can be used , no matter what the phone manufacturers claim the camera on them is crap , they can’t subsitute fully corrected lenses . The best pose in the World is lost on them , most use wide angle lenses so they make close items look much bigger than distant ones , so a close up of a face will make the nose and chin look bigger . On a portrait always centre on the eyes using a longer focal length , the nose and chin will look smaller which gives a more flattering picture . If shooting full length the norm has always been to shoot at waist height , that will balance the upper and lower body and again avoid wide angle lenses . To flatter a bride I would get them to turn and place her weight on the leg
furthest from the camera and then align the feet to produce an elegant leg line . The same pose was taken by the groom but with his shoulder behind the bride .
In portraiture hands could be used to produce a flow round the picture , taking the eye on a journey , that is the crux of good pictures you need to take the eye on that journey to please it .
I spent thirty years trying to flatter people , looking back I was pretty good at it , I do miss it now .